This is a tutorial on the basics of Python packaging.
The content of this tutorial is based on the Python Packaging 101 tutorial from PyOpenSci.
We will cover only the basics, but if you are interested in going deeper, we highly recommend checking the PyOpenSci tutorial.
Before the workshop, please create an account on TestPyPI. We will use TestPyPI to practice publishing your package without affecting the real Python Package Index (PyPI).
We will use GitHub Codespaces for this tutorial, since it removes OS-specific installation hiccups.
-
Fork the repository: https://github.com/pyOpenSci/pyopensci-workshop-create-python-package
This repo has a workspace already set up with VSCode, copier, Hatch, and everything you need to create your first Python package. From this codespace you will also be able to push your work during the workshop to your own fork.
-
Before creating the codespace, update the hatch version in your fork. In
.devcontainer/devcontainer.json, change the hatch version to1.16:"ghcr.io/devcontainers-extra/features/hatch:1": { "version": "1.16" }
This avoids a known incompatibility with the older version pre-installed in the devcontainer.
-
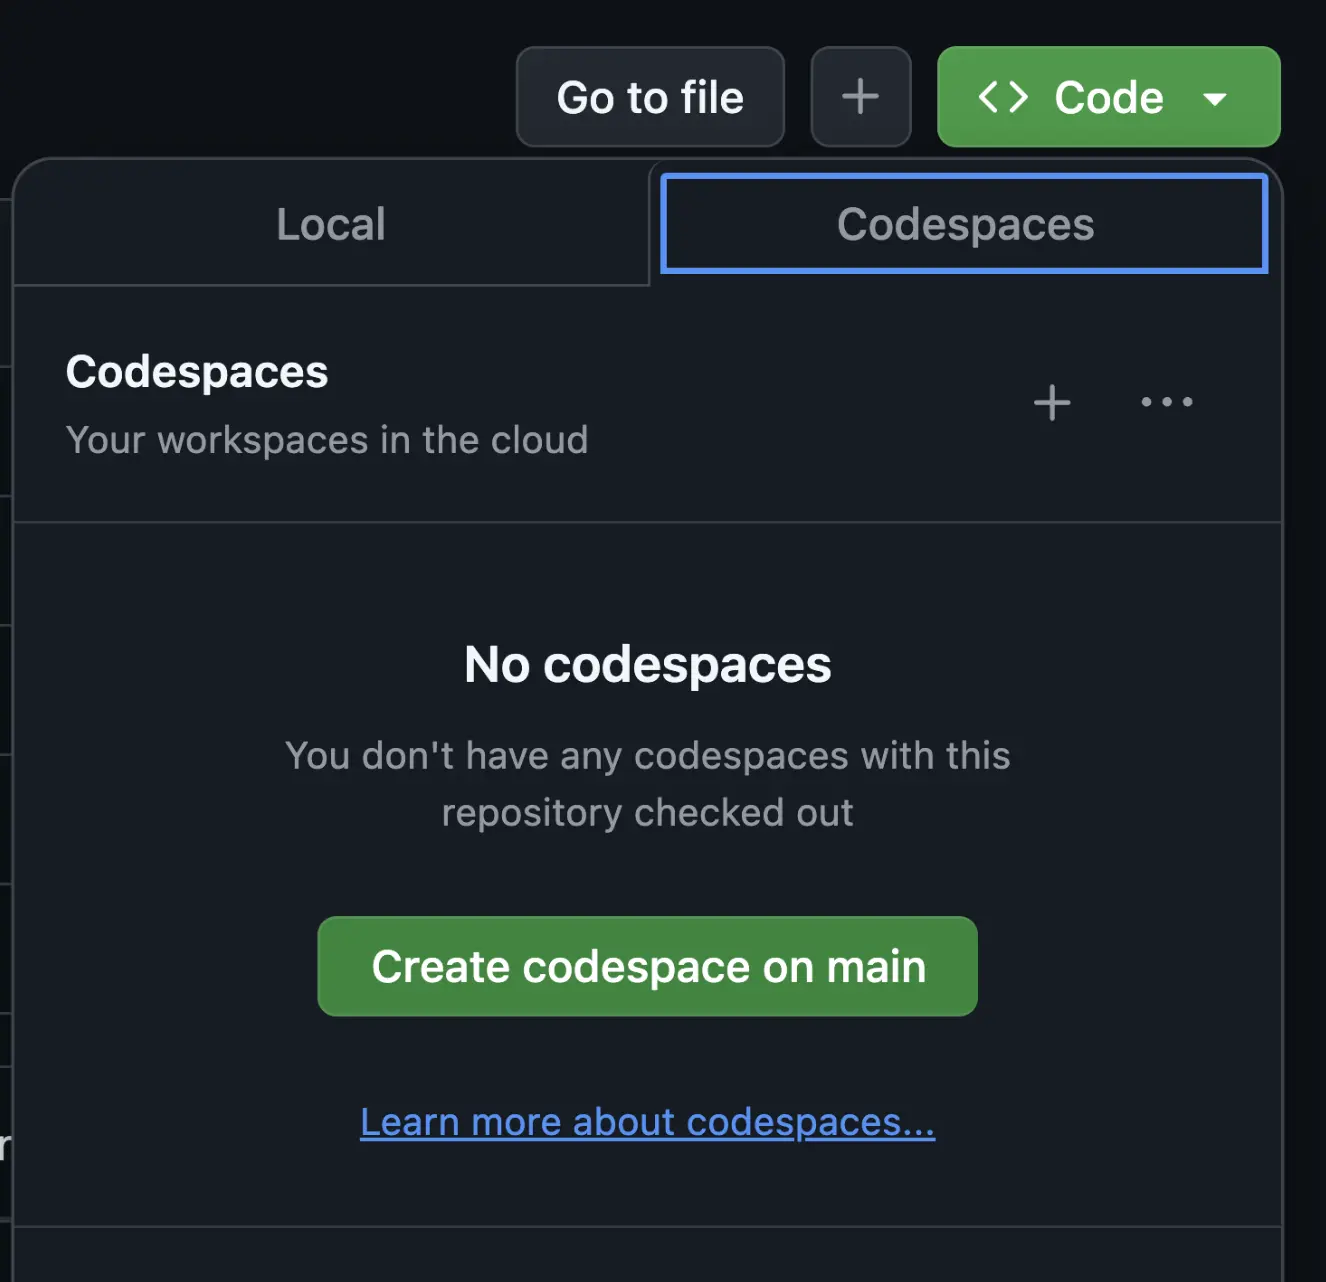
From your fork, go to the green
< > Codetab and select "Create codespace on main". -
Once in the codespace, create a branch for your work:
git checkout -b first-python-package
If you are comfortable setting this up locally, you will need:
-
First, make a directory where your package will live:
mkdir wgxc-package
-
Use the pyOpenSci copier template to scaffold your package. The template uses Hatch as the default packaging tool.
copier copy gh:pyopensci/pyos-package-template .After running the command, the template will walk you through a series of questions.
When you reach the prompt "Do you want to answer one more question, and skip the rest, using the default values?" choose Yes, but with a minimal setup. For this tutorial we want to create the most basic version of your package that contains documentation, tests, and an example module.
The template will ask you for your GitHub username, your package name, and other basic questions. It will then create a package with basic tests, documentation, and GitHub configuration.
You will learn about the basics of the Python package directory structure and associated key files (
__init__.pyandpyproject.toml).
-
Create a virtual environment and activate it:
uv venv source .venv/bin/activate -
Install your package in editable mode:
uv pip install -e .Note: You may see a warning about hardlinks:
warning: Failed to hardlink files; falling back to full copy.This is normal in Codespaces (and Docker containers, mounted volumes, etc.) because the uv cache and your virtual environment are on different filesystems. uv copies the files instead of hardlinking them, but everything installs correctly.
-
Verify the installation:
uv pip list
-
Try importing your package in a Python shell:
>>> import wgxcpack
>>> from wgxcpack.example import add_numbers
>>> help(add_numbers) # or print(add_numbers.__doc__)
>>> add_numbers(1, 2)
3
-
Install your test dependencies. The template defines a
testsextra (check thepyproject.toml), so you can install everything at once:uv pip install -e ".[tests]" -
Run the test suite:
pytest
Let's explore teh test we just run. /tests/test_examples.py
The template includes several useful pytest plugins:
- randomly — randomizes test order automatically. To reproduce a failure, reuse the seed:
pytest -p randomly --randomly-seed=49669506
- xdist — run tests in parallel across CPUs:
pytest -n auto
- cov — measure code coverage:
pytest --cov=wgxcpack
pytest --cov=wgxcpack --cov-report=term-missing  # detailed report
You can combine them:
pytest -n auto --cov=wgxcpack --cov-report=term-missingTip: Before editing
.tomlfiles, install the Even Better TOML extension in VS Code for syntax highlighting and validation. In the codespace, open the Extensions panel (Ctrl+Shift+X) and search for "Even Better TOML".
To add an external dependency (e.g., NumPy), edit your pyproject.toml:
dependencies = ["numpy>=2.0"]Then re-install your package so the new dependency is picked up:
uv pip install -e .Now let's add a function that uses NumPy. Add the following to your existing example.py file (e.g., src/wgxcpack/example.py):
import numpy as np


def sqrt_array(values):
    """Compute the square root of a list of numbers using NumPy.

    Parameters
    ----------
    values : list or float
        A list of non-negative numbers or a single non-negative float.

    Returns
    -------
    numpy.ndarray
        An array with the square root of each input value.

    Raises
    ------
    ValueError
        If any value in the list is negative.

    Examples
    --------
    >>> sqrt_array([4, 9, 16])
    array([2., 3., 4.])

    >>> sqrt_array(9)
    np.float64(3.0)
    """
    arr = np.array(values)
    if np.any(arr < 0):
        raise ValueError("Input contains negative values.")
    return np.sqrt(arr)
Run tests and coverage
pytest -n auto --cov=wgxcpack --cov-report=term-missingNext, add tests for this function in your test file (e.g., tests/test_example.py):
import numpy as np
import pytest
from wgxcpack.example import sqrt_array


def test_sqrt_array_float():
    result = sqrt_array(9)
    assert result == np.float64(3.0)

def test_sqrt_array():
    result = sqrt_array([4, 9, 16])
    expected = np.array([2.0, 3.0, 4.0])
    np.testing.assert_array_equal(result, expected)


def test_sqrt_array_with_zero():
    result = sqrt_array([0, 1])
    expected = np.array([0.0, 1.0])
    np.testing.assert_array_equal(result, expected)


def test_sqrt_array_negative_raises():
    with pytest.raises(ValueError, match="negative"):
        sqrt_array([-1, 4, 9])
Run the tests to make sure everything works, and the coverage is 100%:
pytestFor a reference on supported Python versions, see the Python Developer's Guide.
-
Stage and commit your changes:
git add .
git commit -m "add first python package"
-
Push your branch to your fork:
git push origin first-python-package
-
Open a Pull Request against your own fork's
mainbranch on GitHub.
Once your code is on GitHub, anyone can install your package directly from the repository, let's try that before merging into main:
In our case the package is in a branch, and in a subdirectory, we need to tell uv pip how to find the pyproject.toml
uv pip install git+https://github.com/ncclementi/pyopensci-workshop-create-python-package.git@first-python-package#subdirectory=wgxc-packageYou can check where the package is being installed by doing
uv pip freeze
NOTE: In general if you have a repo dedicated to your package, but want to install from a branch you will just do:
python -m pip install git+https://github.com/<your-username>/<your-repo>.git@first-python-packageReplace <your-username> and <your-repo> with the appropriate values. You can also point to a tag or specific commit.
For more details, see the PyOpenSci guide on installing from GitHub.
- Set up 2FA — you will need it to be able to get a token.
- We will be publishing in the most secure way we can do manually, and for that we need an API token.
Get an API Token
- Go to https://test.pypi.org/manage/account/
- Scroll to the API Token section.
- The first time you do this, you'll need to scope the token to "Entire Account (all projects)". This is because your package isn't there yet to create a package-specific token. Later you can delete this token and create a project-scoped one.
- Copy the token somewhere safe — we will need it shortly.
Note: There are better ways of doing this using CI. We are not going to cover that due to time, but there are detailed instructions in the PyOpenSci tutorial - trusted publishing.
The pyproject.toml has dependencies and configuration needed to build the package with hatch. We need to build the right distribution files (sdist and wheel).
Hatch lets you define different environments that perform specific tasks. One of them is the build environment (this is a custom name defined under [tool.hatch.envs.build]).
For extra info, see the PyOpenSci publishing guide.
In the wgxc-package directory, verify hatch is available:
hatch --versionhatch env showThe version of hatch installed in the devcontainer has a known issue (hatch#2193) that causes hatch run build:check to fail. To fix this, we need to make two changes to the pyproject.toml:
-
Add
hatchlingas a dependency in thebuildenvironment:[tool.hatch.envs.build] dependencies = [ "hatchling", "pip-audit", "twine", ]
-
Update the
checkscript to usehatchling buildinstead ofhatch build:[tool.hatch.envs.build.scripts] check = [ "pip check", "hatchling build {args:--clean}", "twine check dist/*", ]
For more details, see pyopensci-workshop-create-python-package#22.
Let's run the check script:
hatch run build:checkIf everything passes, we are ready to publish.
-
Disable keyring so hatch prompts for the token interactively:
export PYTHON_KEYRING_BACKEND=keyring.backends.null.KeyringBy default, hatch tries to store and retrieve your API token using the system keyring. In Codespaces (and many CI/headless environments), there is no keyring service available, so hatch will fail. Setting
PYTHON_KEYRING_BACKENDto the null backend tells hatch to skip keyring entirely and prompt you for the token directly in the terminal. -
Build the package:
hatch build --clean
-
Publish to TestPyPI:
hatch publish -r testIt will ask for a username — enter
__token__— and a password — paste your API token.Security note: Never pass the token via
-aorexporton the command line — it gets saved in shell history. After publishing, you can clear your history with:history -c && > ~/.bash_history
If hatch publish does not work for you, you can use twine as an alternative.
-
Install twine:
uv pip install twine
-
Upload the distribution files to TestPyPI:
twine upload --repository testpypi dist/* --verboseWhen prompted, paste your API token.
-
Your package should now be on TestPyPI. Let's verify by installing it in a fresh environment:
uv venv new-env source new-env/bin/activate -
Because
numpyis a dependency, we need to tellpipit can grab it from the real PyPI by providing an extra index:uv pip install --index-url https://test.pypi.org/simple/ --extra-index-url https://pypi.org/simple/ wgxcpack
Congratulations! You have created a Python package from scratch, added tests, built distribution files, and published to TestPyPI. These are the foundational steps for any Python package you create in the future.
To learn more about Python packaging best practices — including documentation, CI/CD, community guidelines, and more — check out the PyOpenSci Python Package Guide.
The workshop slides are in the slides/ directory and use Marp for rendering.
- Install the Marp for VS Code extension (
marp-team.marp-vscode). - Open
slides/slides.mdand click the preview icon in the top right corner.
-
Install Marp CLI. For example, with Homebrew:
brew install marp-cli
For other installation methods, see the Marp CLI install instructions.
-
Live preview with hot reload (from the
slides/directory):marp -s slides
Or preview a single file directly:
marp slides/slides.md
-
Export to HTML or PDF (from the
slides/directory):cd slides marp slides.md -o slides.html --theme theme.css marp slides.md --pdf -o slides.pdf --theme theme.cssNote: For PDF export, the Montserrat font must be installed locally on your machine. The HTML export loads it automatically via Google Fonts.
This repository uses a dual license:
- Code (example snippets, scripts, configuration): BSD 3-Clause License
- Content (README, slides, documentation): CC BY-SA 4.0
The written content is based on the PyOpenSci Python Package Guide, which is licensed under CC BY-SA 4.0. You are free to share and adapt this material, provided you give appropriate credit and distribute any derivative works under the same license.