Tab layout
✨ Branch: tab-layout
Introduction
Tab Layout is layout structuring paradigm created in Store Framework to allow the creation of layouts with tabs.
We have the following two containers in this paradigm: tab-list and tab-content. Each of these containers contains the items that it's comprised of. In tab-list, we have tab-list.item, whereas in tab-content, we have tab-content.item, respectively.
We'll look at a tab layout implementation example below.
First, you need to declare the tab-layout block in the desired template:
{
  "store.custom#about-us": {
    "blocks": [
      ...
      "tab-layout"
    ]
  }
}
Then, you need to declare a tab-list and a tab-content as tab-layout's children:
...
"tab-layout": {
  "children": [
    "tab-list",
    "tab-content"
  ]
}
Having done this, these two containers are components of our tab-layout. The next step is to declare tab-list.item and tab-content.item as tab-list's and tab-content's children:
...
"tab-list": {
  "children": [
    "tab-list.item#1",
    "tab-list.item#2"
    ]
}
...
"tab-content": {
"children": [
"tab-content.item#1",
"tab-content.item#2"
]
}In the next step, we'll declare the tab-list.item properties. The code below creates a tab interface similar to the image below:
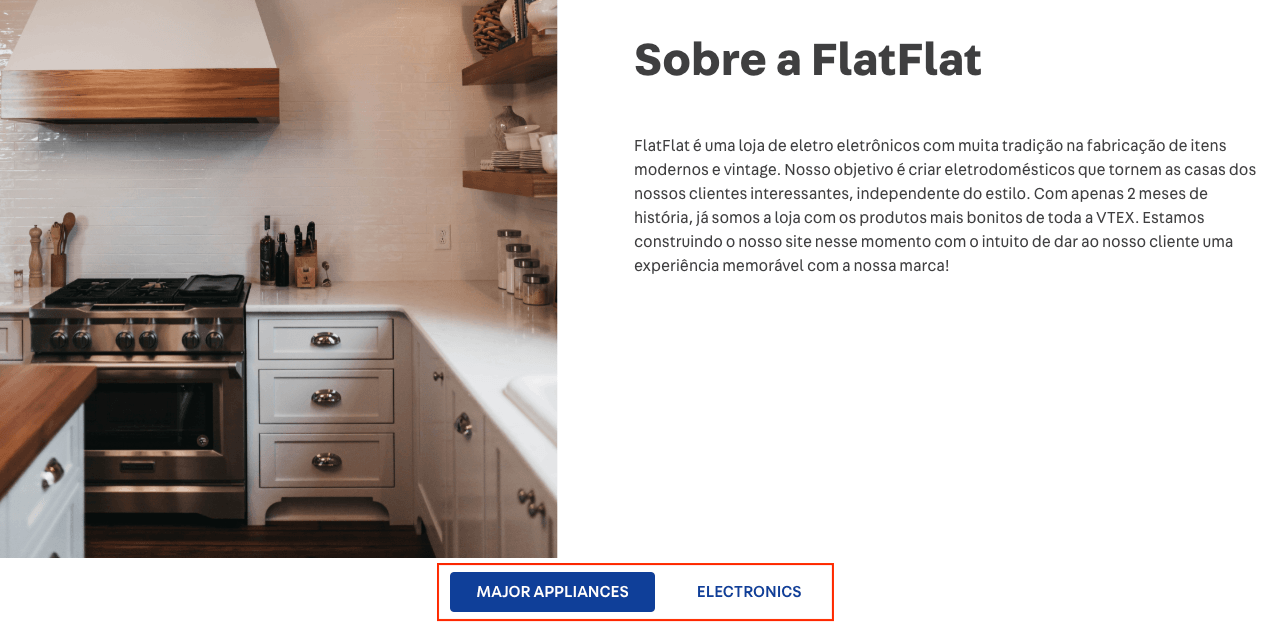
The tabId property is very important as it's the key that connect a tab-list.item button with a tab-content.item.
...
"tab-list.item#1": {
  "props": {
    "tabId": "majorAppliances",
    "label": "Major Appliances",
    "defaultActiveTab": true
  }
},
"tab-list.item#2": {
  "props": {
    "tabId": "electronics",
    "label": "Electronics"
  }
}
Now, let's declare the children and props pertaining to tab-content.item.
In the child array, you can include several blocks such as rich-text, info-card, image, flex-layout and etc.
In the tabId prop, you need to include the same ids that were declared in tab-list.item for the link between the tab and content to function properly.
...
"tab-content.item#1": {
  "children": [
    "rich-text#1"
  ],
  "props": {
    "tabId": "majorAppliances"
  }
},
"tab-content.item#2": {
  "children": [
    "rich-text#2"
  ],
  "props": {
    "tabId": "electronics"
  }
}
Lastly, you must declare your content's proprieties. In our example, we just placed a rich-text in each tab-content.item:
"rich-text#1": {
  "props": {
    "text": "Texto para Major Appliances",
    "textPosition": "CENTER",
    "font": "t-heading-3"
  }
},
"rich-text#2": {
  "props": {
    "text": "Texto para Electronics",
    "textPosition": "CENTER",
    "font": "t-heading-3"
  }
}
Activity
In this activity, we will create the simple structure of a tab layout, as shown below. Thereafter, we will add some content to give our page a custom style.

-
In the previously created about-us.jsonc, add a tab-layout#home to the store.custom#about-us template;
-
Declare the tab-layout#home block and add tab-list#home and tab-content#home as its children;
-
Declare tab-list#home and add tab-list.item#home1 and tab-list.item#home2 as its children;
-
Declare the props pertaining to tab-list.item#home1 so that the interface displays "Major Appliances". (Tip: Do not forget to include tabId = "majorAppliances" as well as the property defaultActiveTab = true to the props);
-
Declare tab-list.item#home2's props so that the interface displays "Electronics". (Tip: Don't forget to include tabId = "electronics" to the props);
-
Now, let's move on to the content. Declare tab-content#home in your theme and add tab-content.item#home1 and tab-content.item#home2 as children;
-
For each tab-content.item, declare just one rich-text as child (for example, rich-text#home1 and rich-text#home2);
-
Thereafter, include a tabId prop for each tab-content.item to create a link between the previously created tab-list and tab-content;
-
Lastly, add the rich-text and declare its props according to the code below:
"rich-text#home1": {
  "props": {
    "text": "Área do conteúdo da tab-list.item com  tabId = majorAppliances",
    "textPosition": "CENTER",
    "font": "t-heading-3"
  }
},
"rich-text#home2": {
  "props": {
    "text": "Área do conteúdo da tab-list.item com  tabId = electronics",
    "textPosition": "CENTER",
    "font": "t-heading-3"
  }
}
ℹ️ Remember to access the Tab Layout and Rich Text documentation for any questions during the activity.
If you're still unsure as to how to send your answers, click here.
Tab layout
✨ Branch: tab-layout
Introduction
Tab Layout is layout structuring paradigm created in Store Framework to allow the creation of layouts with tabs.
We have the following two containers in this paradigm:
tab-listandtab-content. Each of these containers contains the items that it's comprised of. Intab-list, we havetab-list.item, whereas intab-content, we havetab-content.item, respectively.We'll look at a tab layout implementation example below.
First, you need to declare the
tab-layoutblock in the desired template:{ "store.custom#about-us": { "blocks": [ ... "tab-layout" ] } }Then, you need to declare a
tab-listand atab-contentastab-layout's children:Having done this, these two containers are components of our
tab-layout. The next step is to declaretab-list.itemandtab-content.itemastab-list's andtab-content's children:In the next step, we'll declare the
tab-list.itemproperties. The code below creates a tab interface similar to the image below:The
tabIdproperty is very important as it's the key that connect atab-list.itembutton with atab-content.item.Now, let's declare the children and props pertaining to
tab-content.item.In the child array, you can include several blocks such as
rich-text,info-card,image,flex-layoutand etc.In the
tabIdprop, you need to include the same ids that were declared intab-list.itemfor the link between the tab and content to function properly.Lastly, you must declare your content's proprieties. In our example, we just placed a
rich-textin eachtab-content.item:Activity
In this activity, we will create the simple structure of a tab layout, as shown below. Thereafter, we will add some content to give our page a custom style.
In the previously created
about-us.jsonc, add atab-layout#hometo thestore.custom#about-ustemplate;Declare the
tab-layout#homeblock and addtab-list#homeandtab-content#homeas its children;Declare
tab-list#homeand addtab-list.item#home1andtab-list.item#home2as its children;Declare the props pertaining to
tab-list.item#home1so that the interface displays "Major Appliances". (Tip: Do not forget to includetabId="majorAppliances"as well as the propertydefaultActiveTab=trueto the props);Declare
tab-list.item#home2's props so that the interface displays "Electronics". (Tip: Don't forget to includetabId="electronics"to the props);Now, let's move on to the content. Declare
tab-content#homein your theme and addtab-content.item#home1andtab-content.item#home2as children;For each
tab-content.item, declare just onerich-textas child (for example,rich-text#home1andrich-text#home2);Thereafter, include a
tabIdprop for eachtab-content.itemto create a link between the previously createdtab-listandtab-content;Lastly, add the
rich-textand declare its props according to the code below:ℹ️ Remember to access the Tab Layout and Rich Text documentation for any questions during the activity.
If you're still unsure as to how to send your answers, click here.